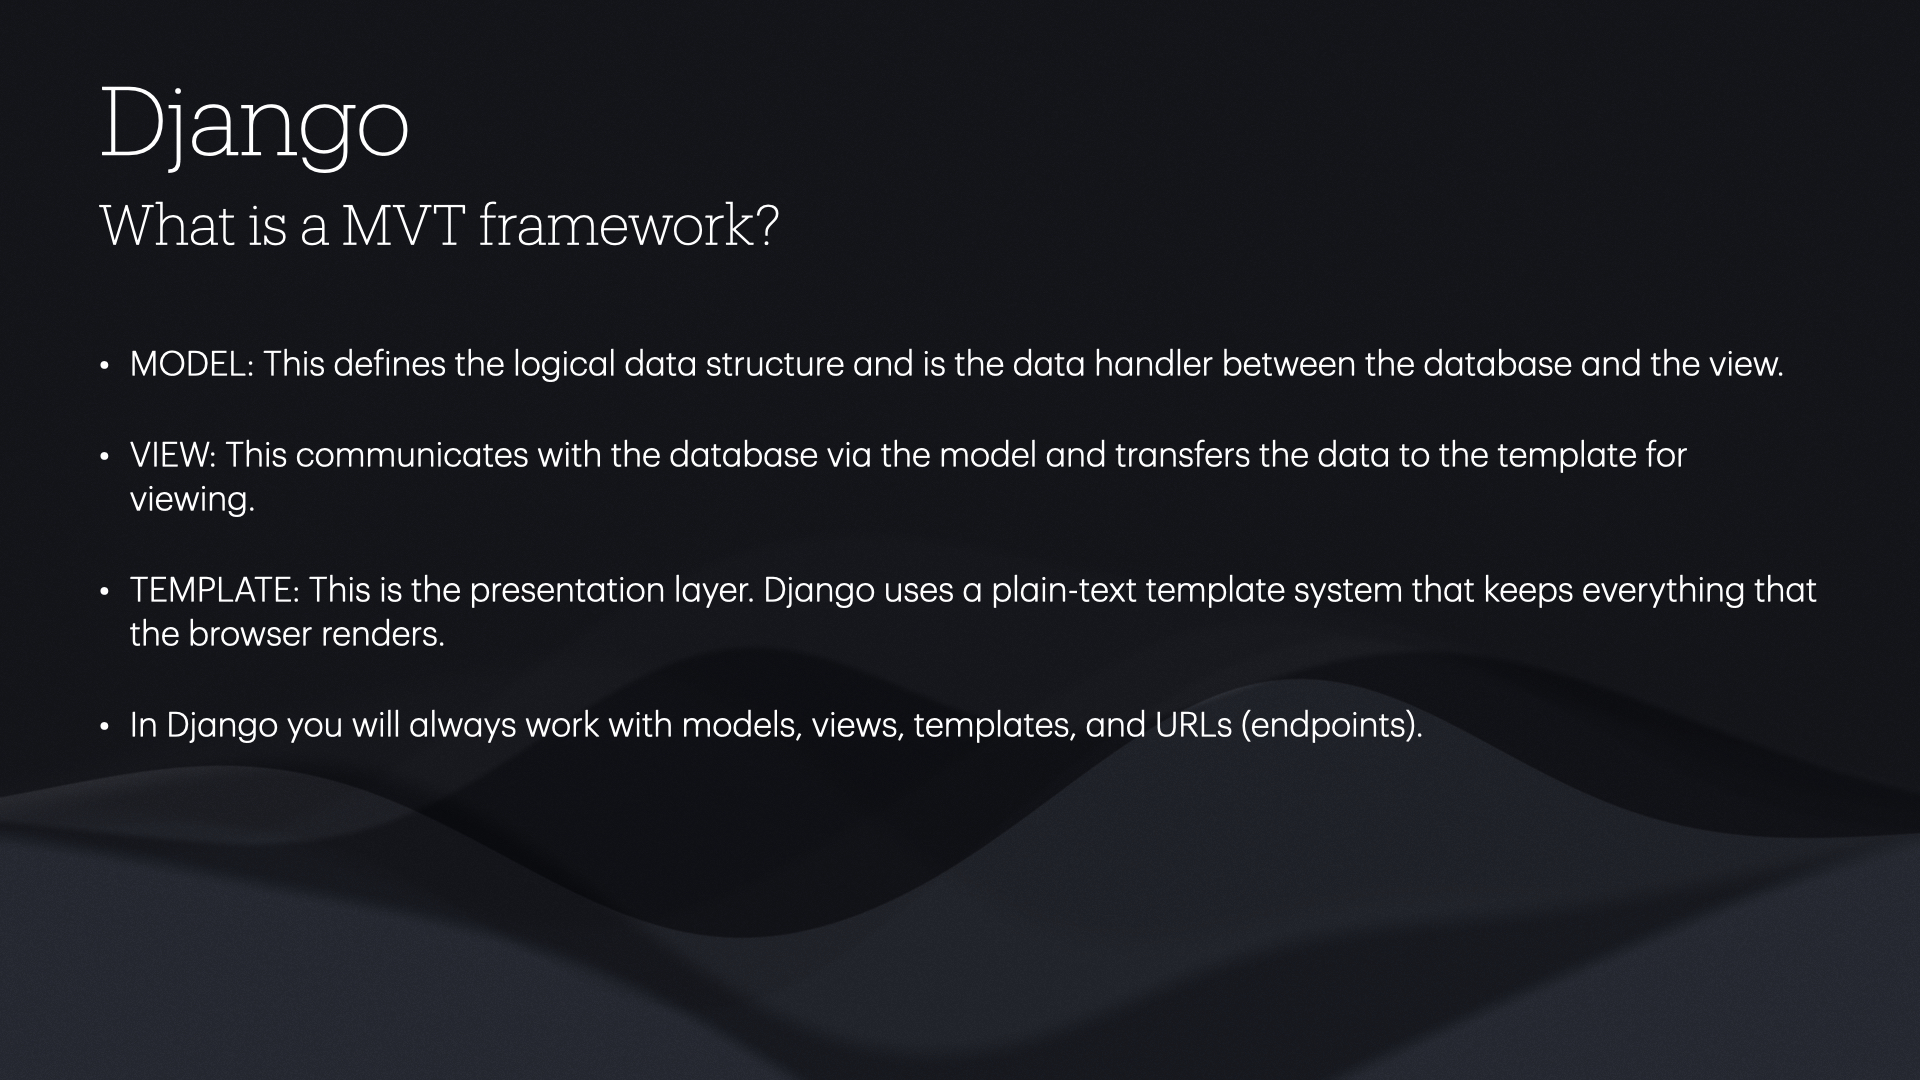
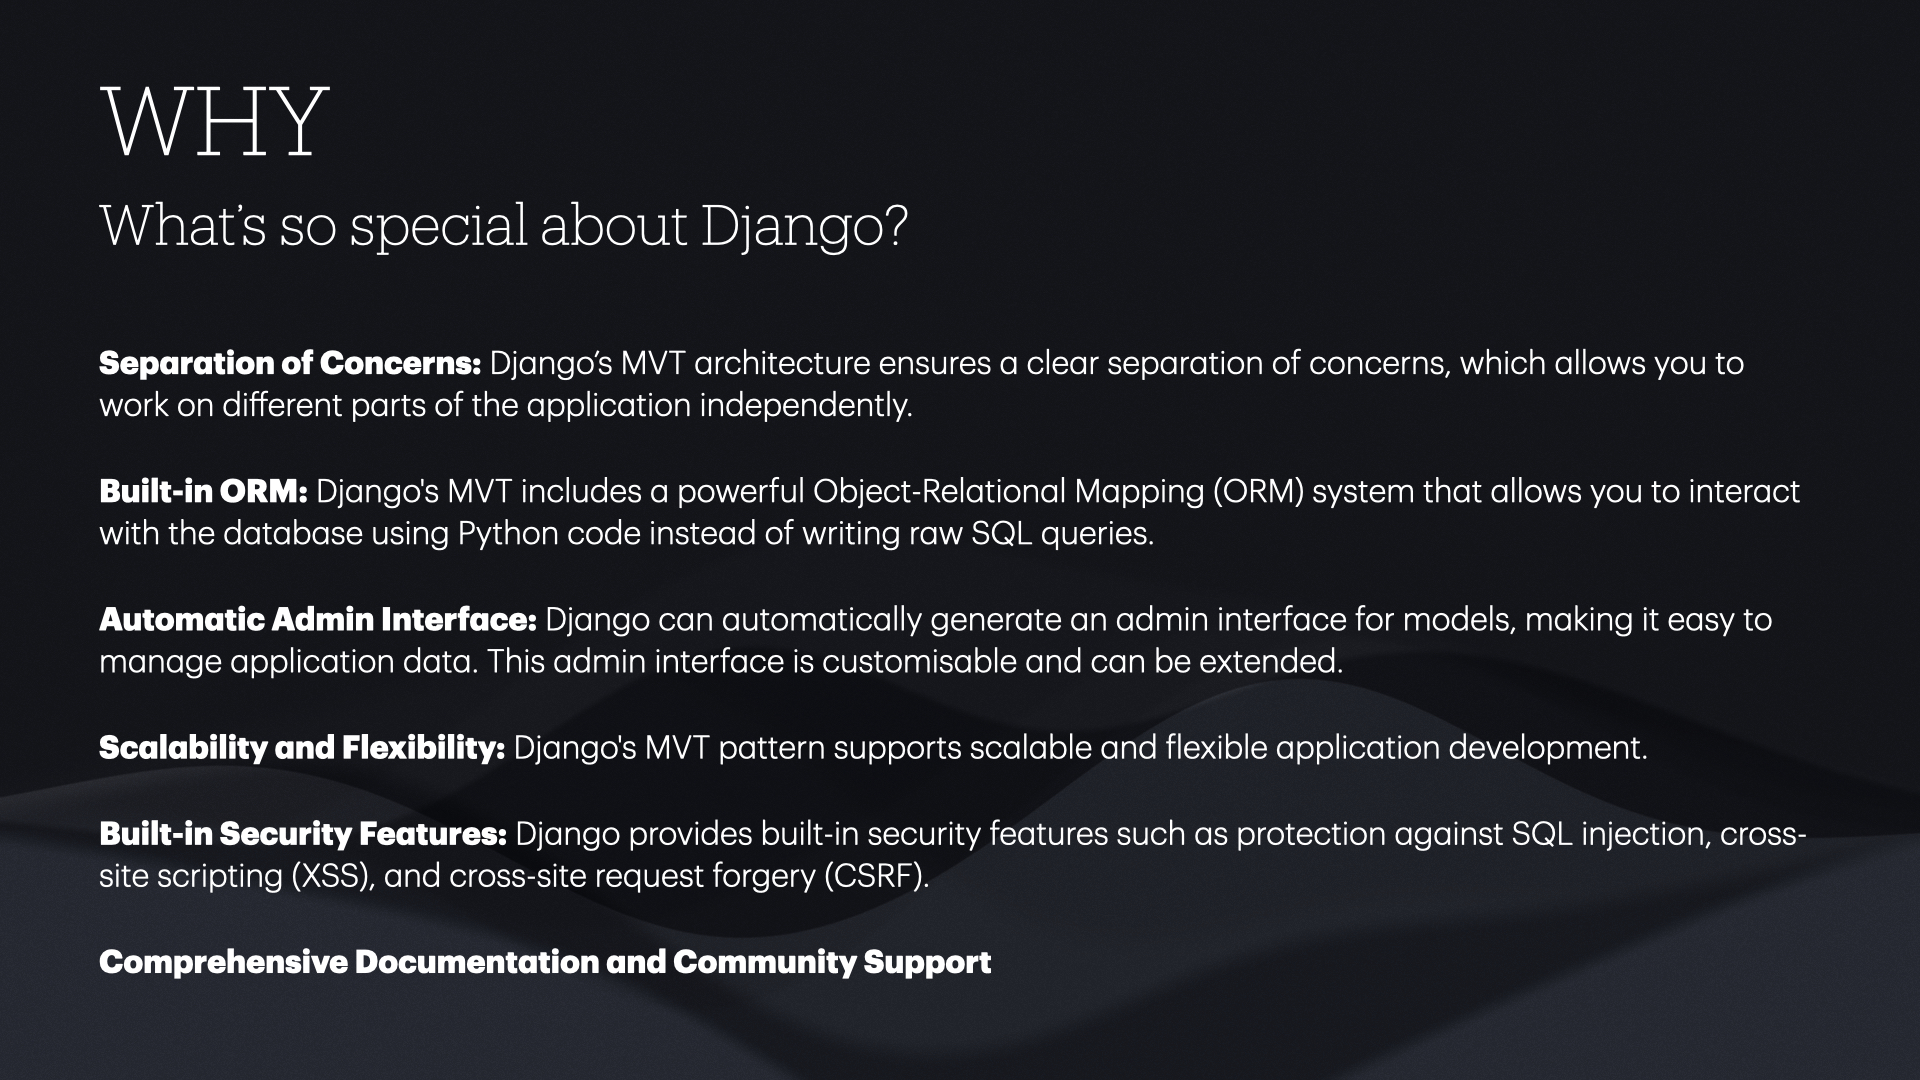
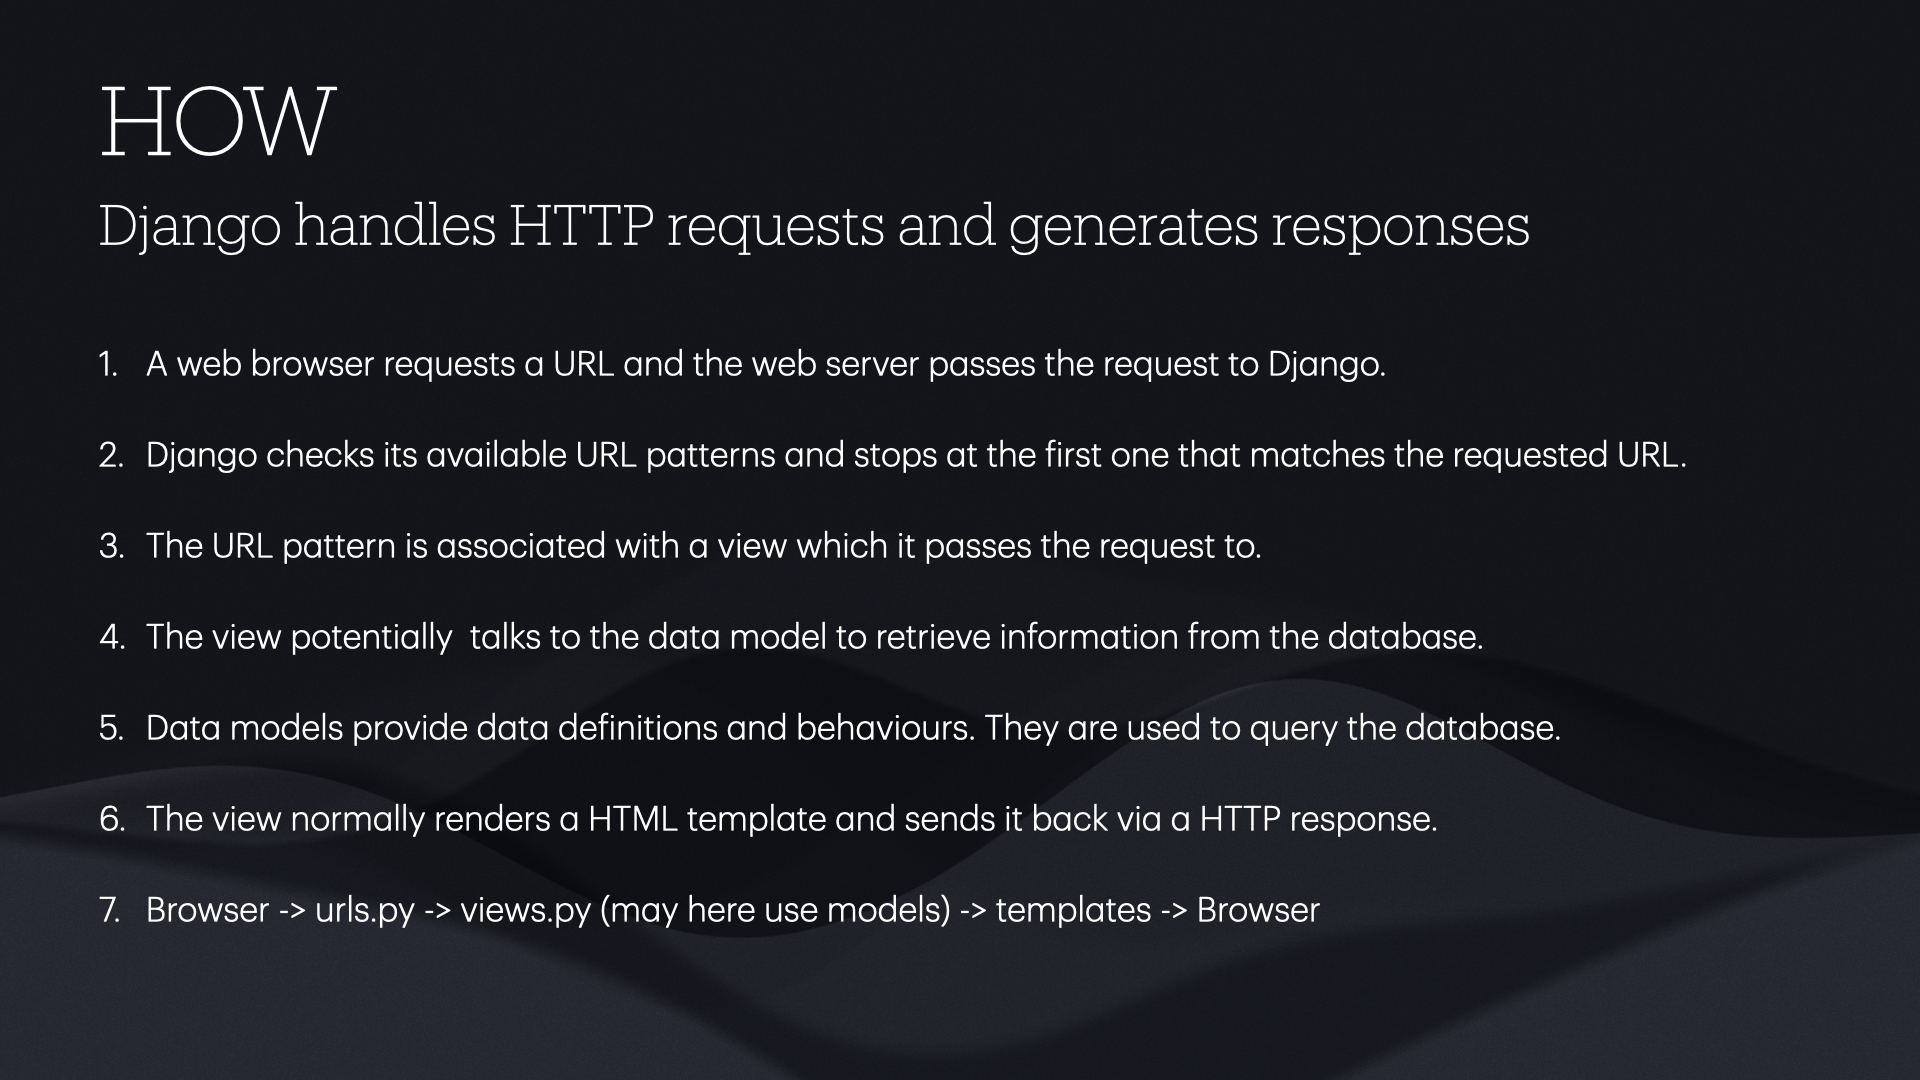
Welcome to the djangohelp repository! This project is designed to help learners understand the basics of Django, a powerful web framework for Python. Whether you are new to Django or looking to reinforce your skills, this repository provides a hands-on approach to learning.
- Python 3.x installed on your machine
- Pip (Python package installer)
-
Clone the Repository
git clone https://github.com/5pence/djangohelp.git cd djangohelp -
Create a Virtual Environment
python -m venv env
source env/bin/activate   # On Windows, use `env\Scripts\activate`
-
Install Dependencies
pip install -r requirements.txt
-
Navigate to the Project Directory
cd mysite -
Apply Migrations
python manage.py migrate
-
Run the Server
python manage.py runserver
Open your browser and go to
http://127.0.0.1:8000/blogto see your Django project in action.
mysite/- Main project directory containing settings and configuration files.blog/- Example app directory demonstrating a simple blog application.manage.py- Command-line utility for interacting with the project.
- Django Official Documentation
- Tutorial: Writing your first Django app
- Querysets
- Django Template Language
- Class-based generic views
- Extending the user model
- Also check out the PDF slides at the footer of this doc
Go here and download and install it:
- Python Download
- Once installed properly check with
python3 --versionin command line
- Git download
- Once installed properly check with
gitin command line
- Goto directory you want to create one
- On Mac/Linux
python3 -m venv my_venv - On Windows
py -m venv my_venvThen: - On Mac/Linux
source my_venv/bin/activate - On Windows
.\my_venv\Scripts\activateThe shell/command line prompt will now include your virtual environment(my_venv) name/directory/on/computer:
python3 -m pip install DjangoYou can check with:python3 -m django --versionAnd then create the actual project:django-admin startproject projectnamecd projectnamepython3 manage.py migratepython3 manage.py runserverIt should then tell you where to go in your browser (localhost:8000) usually and show you 'The install worked successfully screen`
You extend the Django User model, I show you how here:
I usually name the Django Model as Profile:
from django.db import models
from django.contrib.auth.models import User

class Profile(models.Model):
    user = models.OneToOneField(User, on_delete=models.CASCADE)
    bio = models.TextField(max_length=400, blank=True)
    location = models.CharField(max_length=25, blank=True)
Now define signals so my Profile model will be automatically created and updated when I create/update User instances.
from django.db import models
from django.contrib.auth.models import User
from django.db.models.signals import post_save
from django.dispatch import receiver

class Profile(models.Model):
    user = models.OneToOneField(User, on_delete=models.CASCADE)
    bio = models.TextField(max_length=400, blank=True)
    location = models.CharField(max_length=25, blank=True)

@receiver(post_save, sender=User)
def create_user_profile(sender, instance, created, **kwargs):
    if created:
        Profile.objects.create(user=instance)

@receiver(post_save, sender=User)
def save_user_profile(sender, instance, **kwargs):
    instance.profile.save()
So by hooking the create_user_profile and save_user_profile methods to the User model, whenever a save event occurs. This kind of signal is called post_save.
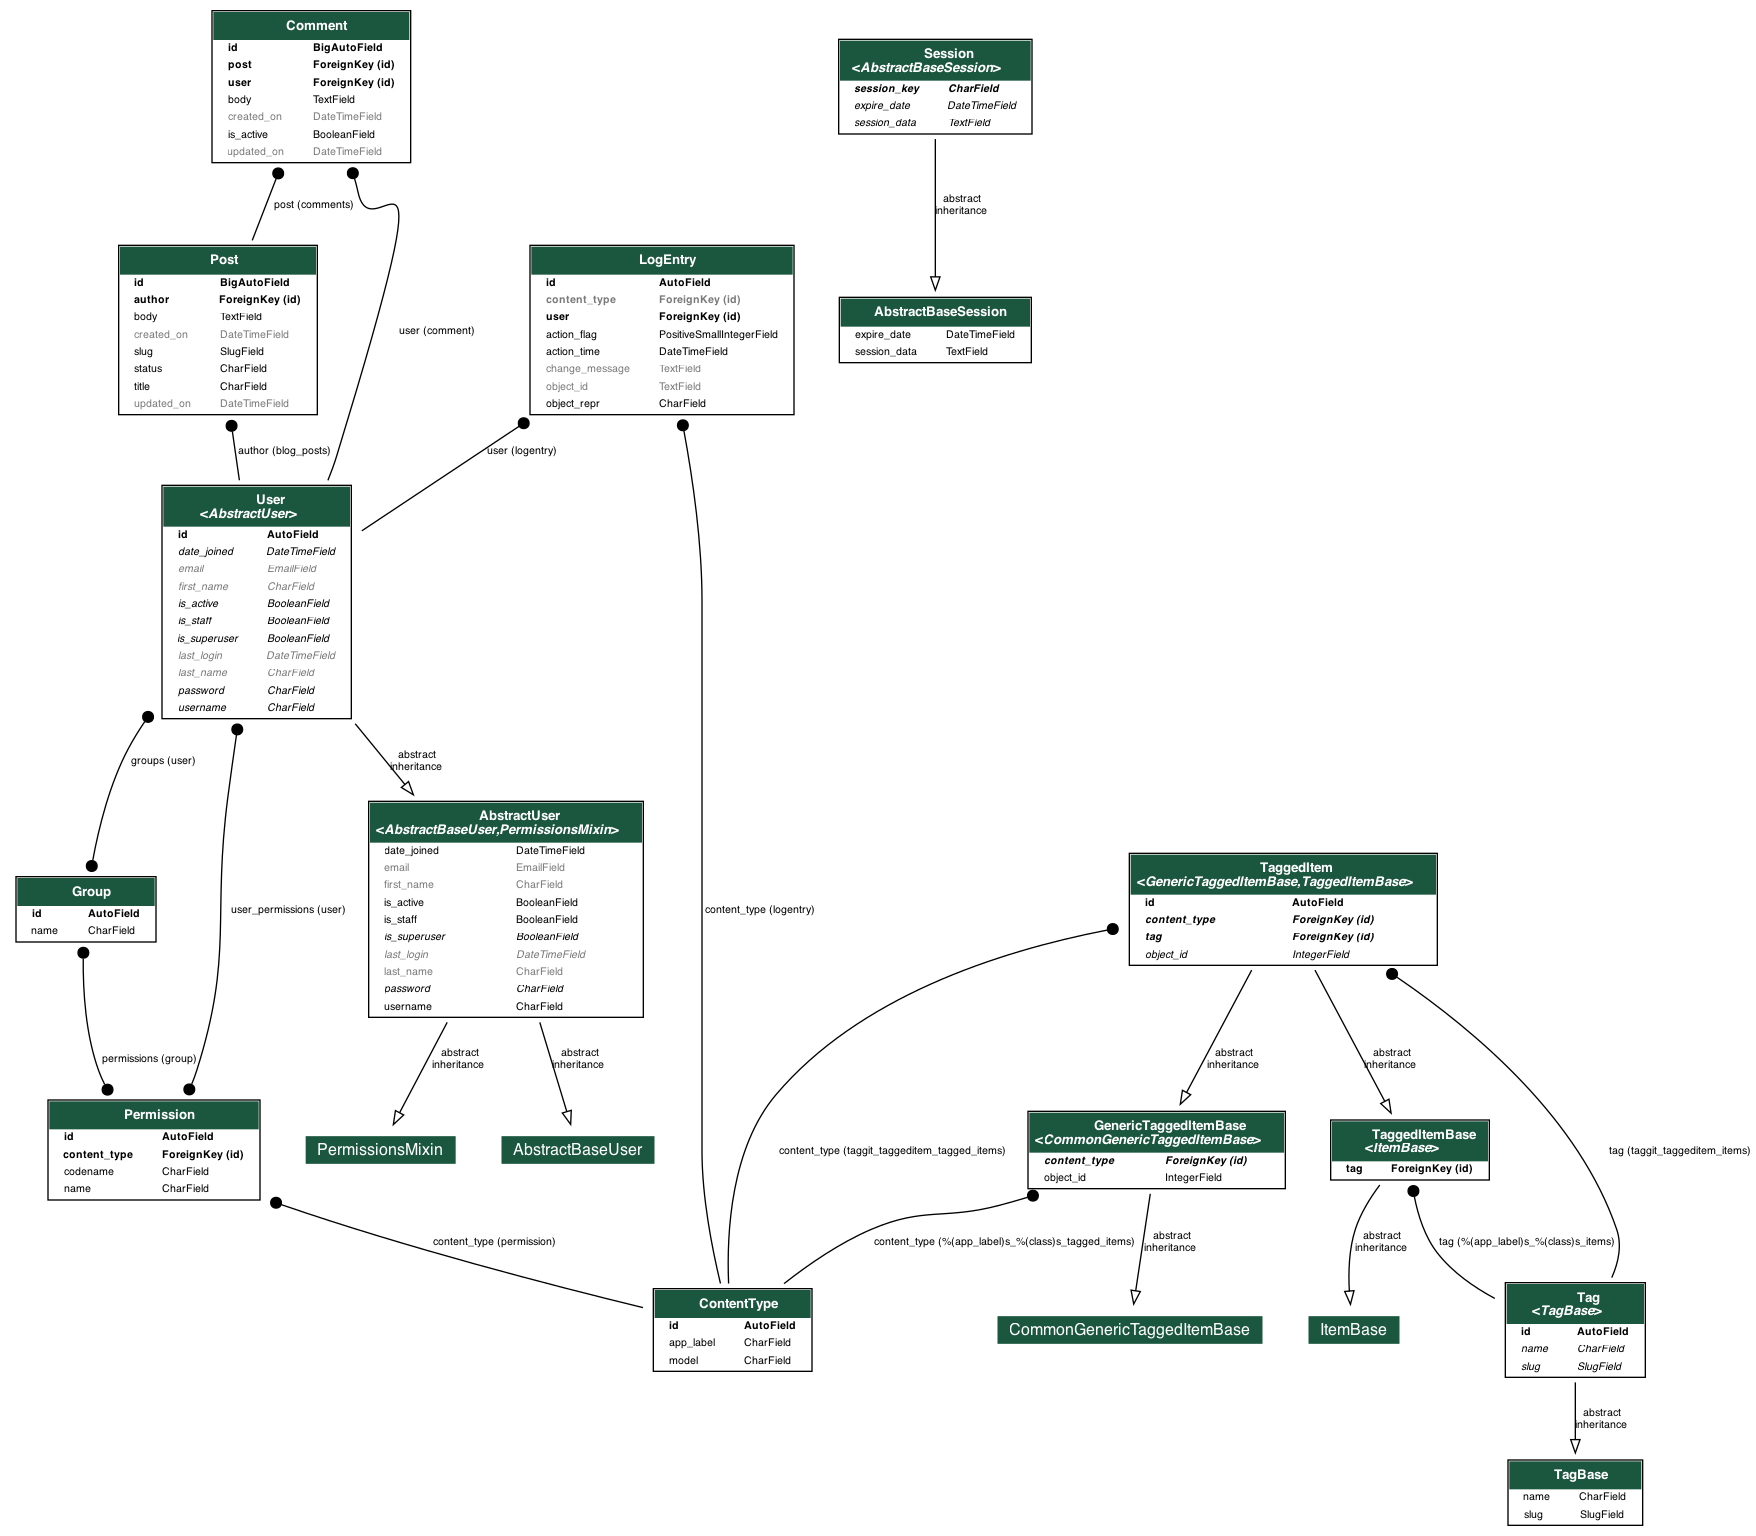
- Write it out and take a photo
- Or use some app
- Or try this - though it can be tricky at times (getting Django + extensions to draw it)
- Django-extensions
Happy coding! If you have any questions, feel free to open an issue.