The SSD detector differs from others single shot detectors due to the usage of multiple layers that provide a finer accuracy on objects with different scales. (Each deeper layer will see bigger objects). The SSD normally start with a VGG on Resnet pre-trained model that is converted to a fully convolution neural network.
Then we attach some extra conv layers, which will actually help to handle bigger objects. The SSD architecture can in principle be used with any deep network base model. One important point to notice is that after the image is passed on the VGG network, some conv layers are added producing feature maps of sizes 19x19, 10x10, 5x5, 3x3, 1x1. These, together with the 38x38 feature map produced by VGG’s conv4_3, are the feature maps which will be used to predict bounding boxes. There the conv4_3 is responsible to detect the smallest objects while the conv11_2 is responsible for the biggest objects.

Single Shot: Object localization and classification is done in single forward pass of network
MultiBox: Technique for bounding box regression
Detector: Classify the detected objects
The architecture of SSD is built based on the VGG-16 architecture. But here is a little tweak on the VGG-16, we use the set of auxiliary convolutional layers from Conv6 layer onwards instead of fully connected layers. The reason of using VGG-16 as foundational network is its high quality image classification and transfer learning to improve results. Using the auxiliary convolutional layers we can extract features at multiple scales and progressively decrease the size at each following layer. I have discussed how this works in following section. You can see the following image for VGG-16 architecture. It contains fully connected layers.


In the above picture, we have an image with few horses. We have divided our input image into the set of grids. Then we make couple of rectangles of different aspect ratio around those grids. Then we apply convolution in those boxes to find if there is an object or not in those grids. Here one of the black horse is closer to the camera in the image. So the rectangle we draw is unable to identify if that is horse or not because the rectangle does not have any features that are identifying to horses.

If we see the above architecture of SSD, we can see in each step after conv6 layer the size of images gets reduced substantially. Then every operation we discussed on making grids and finding objects on those grids applies in every single step of the convolution going from back to front of the network. The classifiers are applied in every single step to detect the objects too. So since the objects become smaller in each steps they gets easily identified.
The SSD algorithm also knows how to go back from one convolution operation to another. It not only learns to go forward but backwards too. For e.g if it sees horse in conv4 then it can return to conv6 and the algorithm will draw the rectangle around the horse.
To train our algorithm, we need a training set that contains image with objects and those objects must have bounding boxes on them. Learning this way, the algorithms learn how to put rectangle on the object and where to put. We minimize the errors between inferred bounding boxes and ground truth to optimize our model to detect the object correctly. Unlike in CNN, we don’t only predict if there is an object in the image or not we also need to predict where in the image the object is. During training the algorithm learn to adjust the height and width of the rectangle in the object.We are importing the Variable class which will be used to convert the tensors into some Pytorch variables that will contain both the tensor and a gradient.
We're just importing CV2 because we will be drawing some rectangles around the detected objects based on as is the neural network with single shot multi-box detection.
BaseTransform is a class that will do the required transformations so that the input images will be compatible with the neural network.
VOC_CLASSES is just a dictionary that will do the encoding of the classes. So for example planes will be encoded as '1'. So that's just a very simple dictionary doing the mapping between the text fields of the classes and some integers.
ssd is the library of the single shot multi-box detection model. build_ssd will be the constructor of the SSD neural network.
imageio is just the library that we'll use to process the images of the video and applying it to the detect function that will implement on the images. So at first, I wanted to import PIL which is another library but imageio actually turns out to be a much better choice in terms of lines of code.
The first thing very important to understand is that exactly like before we are going to do a frame by frame detection that is the detect function that will work on single images it will not do the detection on the video directly it will do the detection on each single image of the video and then using some tricks with actually imageio, we will manage to extract all the frames of the video apply the detect function on the frames and then reassemble the whole thing to make the video with the rectangles detecting the objects and humans.
In this implementation, I used a pre-trained SSD300 network for detection.
ssd300_mAP_77.43_v2.pth file is the file we will be loading to get the pre-trained SSD model and more precisely this is the file that contains the weight of the SSD neural network that was already pre-trained. So we will be loading this file with Pytorch and Pytorch load function will open a tensor, a tensor that will contain the weight of this already pre-trained neural network and then through a mapping with a dictionary we will transfer these weights to the model we implement.
You can download the SSD300 trained on VOC0712 (newest PyTorch weights) from the following link: https://s3.amazonaws.com/amdegroot-models/ssd300_mAP_77.43_v2.pth
SSD300 achieves 74.3% mAP at 59 FPS while SSD500 achieves 76.9% mAP at 22 FPS, which outperforms Faster R-CNN (73.2% mAP at 7 FPS) and YOLOv1 (63.4% mAP at 45 FPS).

-
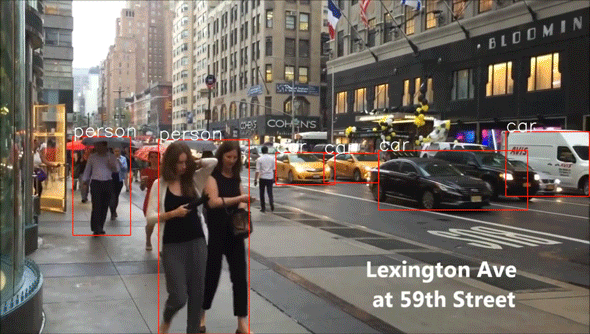
This Single Shot Multibox Detection (SSD) framework can be used with Kalman filter for vehicle tracking and detection in autuonomus vehicles.
-
With the integration of a Text-to-Speech API, it can be used as a navigation helper for visually impaired people. With the help of the microcomputers(such as Raspberry Pi) and game engines(such as Unity framework), the 3D sound can be simulated and this audio signal can be transmitted to the user for informing the objects as well as their spatial locations.
-
SSD: Single Shot MultiBox Detector Research Paper Wei Liu, Dragomir Anguelov, Dumitru Erhan, Christian Szegedy, Scott Reed, Cheng-Yang Fu, Alexander C. Berg https://arxiv.org/abs/1512.02325
-
Original Implementation (CAFFE) https://github.com/weiliu89/caffe/tree/ssd
-
SSD(Single Shot Multi-Box Detection) for real time object detection https://medium.com/@rabinpoudyal1995/ssd-single-shot-multi-box-detection-for-real-time-object-detection-5f2a06e33a4a
-
Review: SSD Single Shot Detector (Object Detection) https://towardsdatascience.com/review-ssd-single-shot-detector-object-detection-851a94607d11