The repo is split into 3 folders consisting of files related to the web application, firmware, and postprocessing.
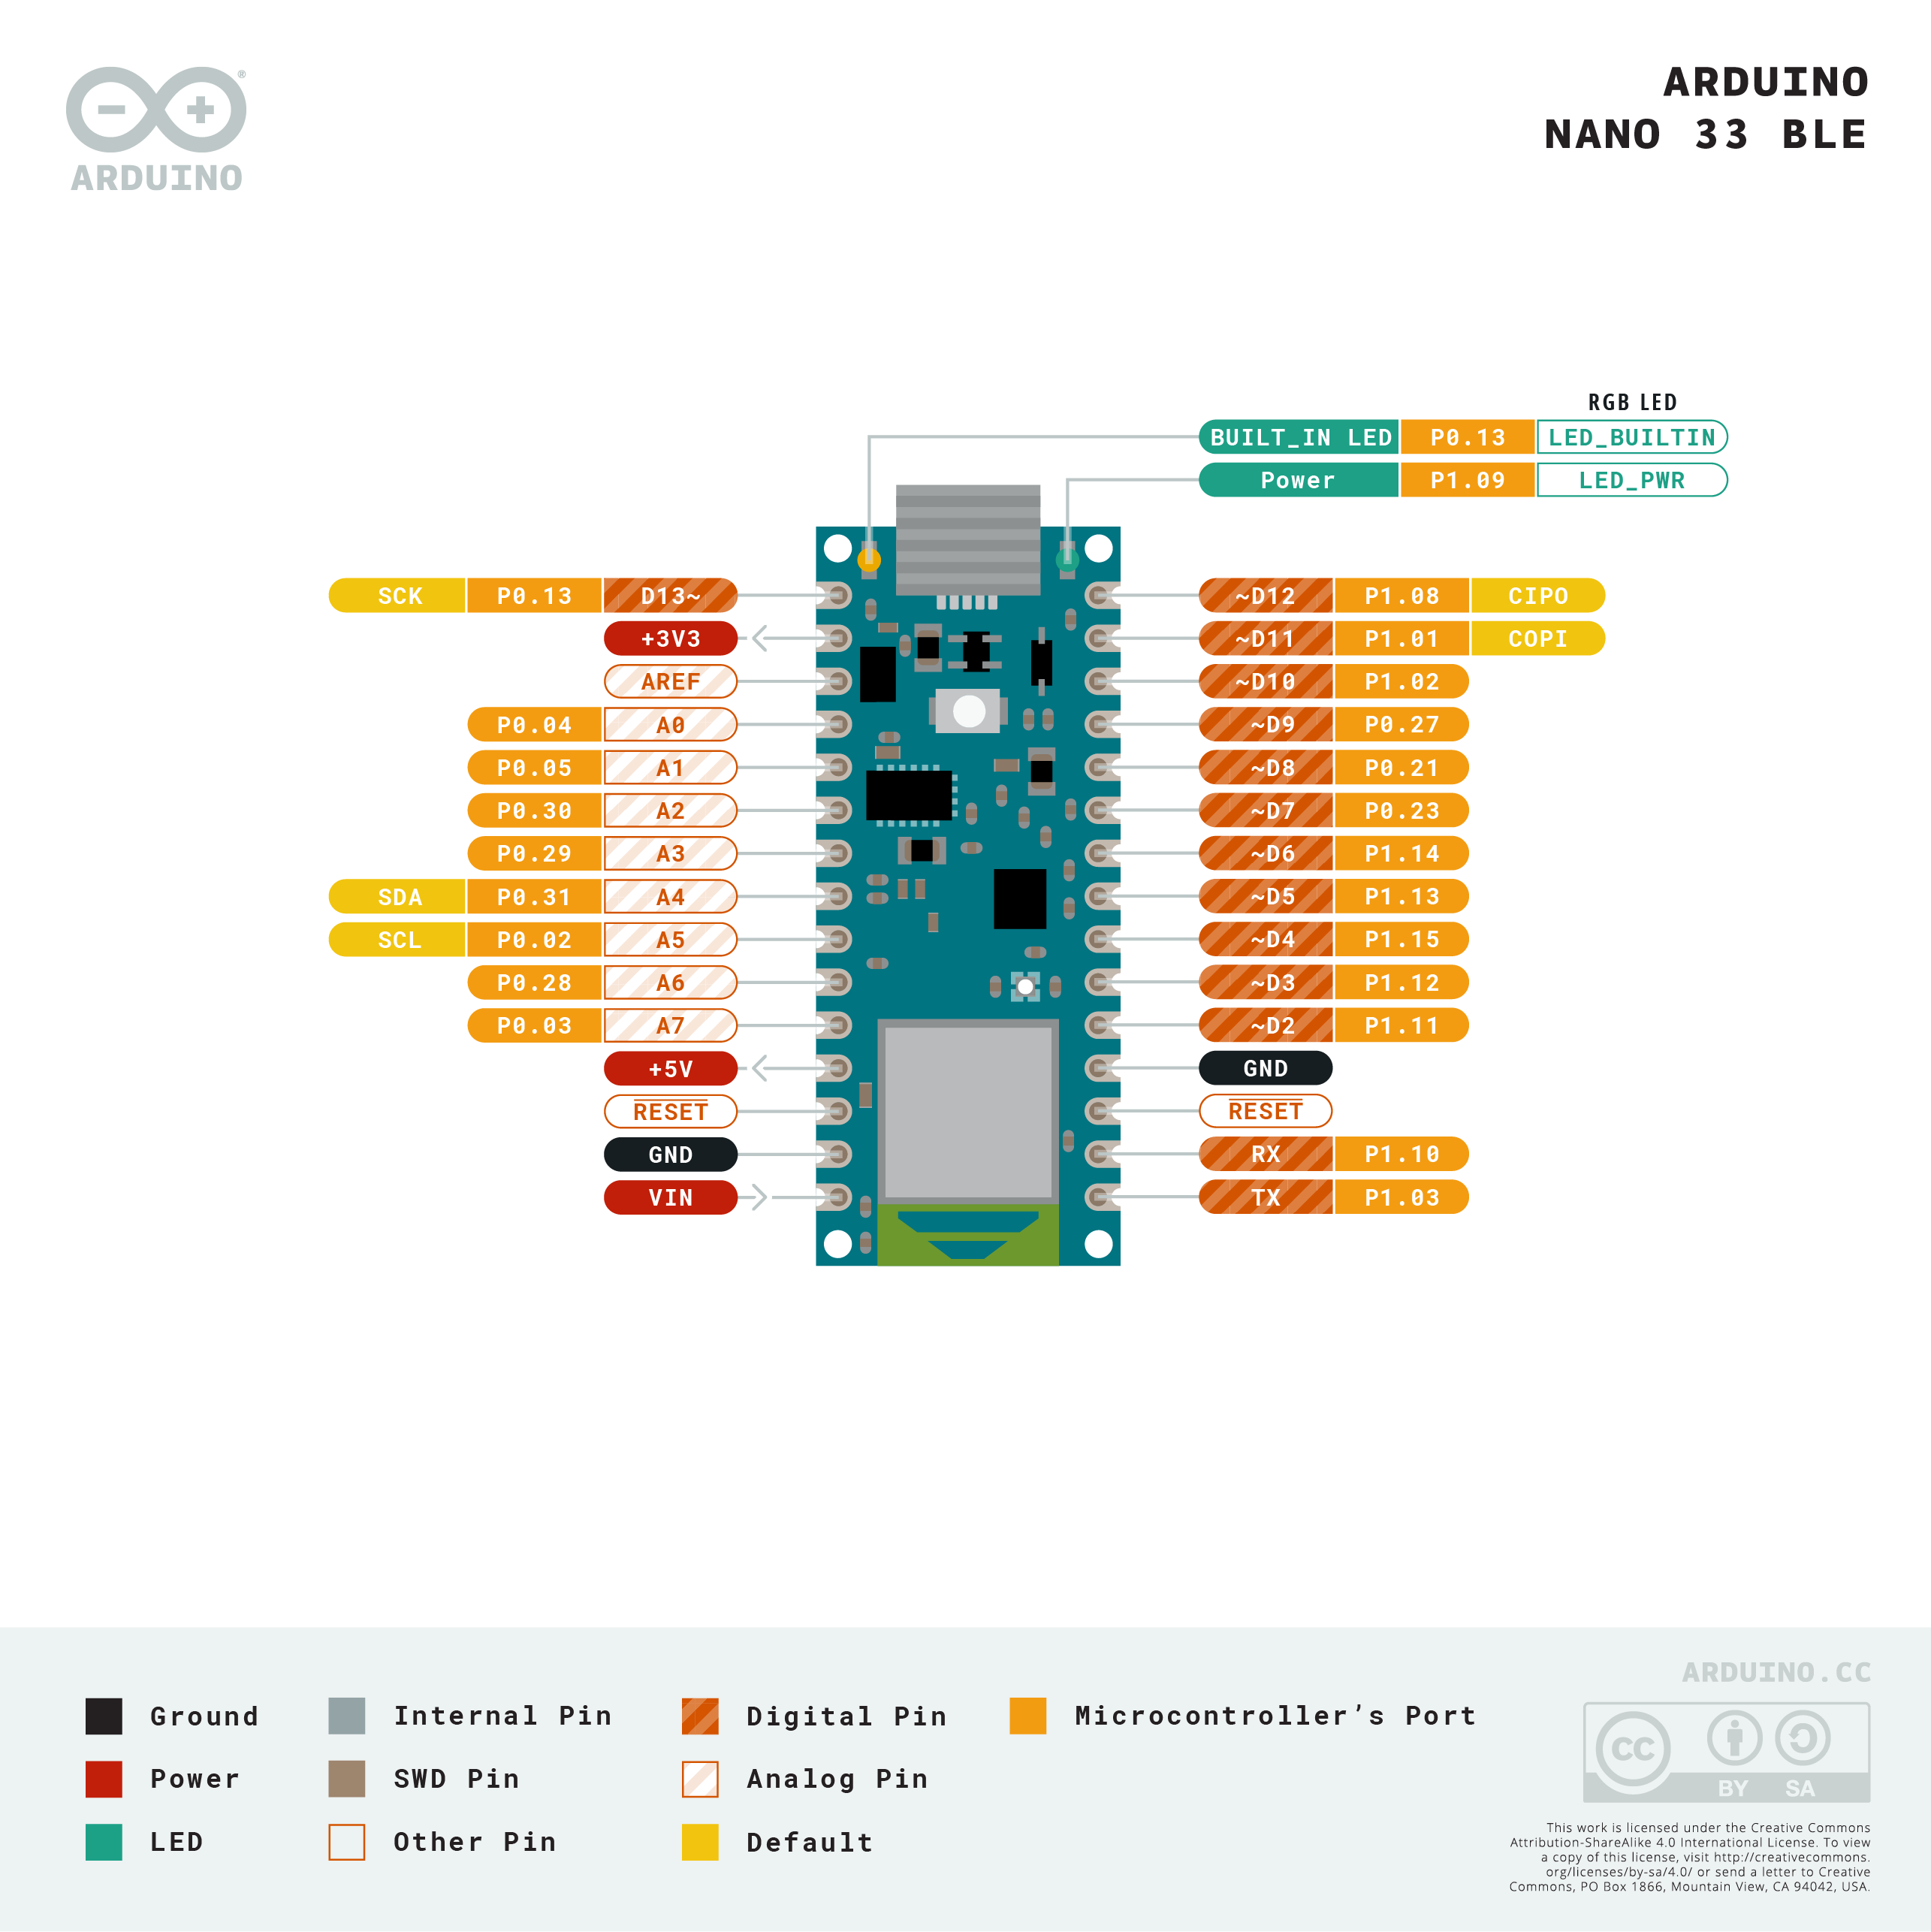
The hardware module is built on top of an Arduino Nano 33 BLE Sense which itself uses a Nordic Semiconductor nRF52840. Because of this we use the mbed Arduino Core which itself uses mbed (v6.17 at time of writing). For ease of use the current firmware is flashable through the Arduino IDE without any modifications, however this does not enable use of external flash chips for read/writes which limits the total time loggable to ~2 minutes by partitioning the onboard flash storage into two 512kb divisions, with one containing firmware and the other half used for logging data. In order to enable external flash devices please refer to How to Setup. The majority of the core functionality is built on standard C functionality and should be fairly portable to other hardware, however we currently use Arduino libraries to collect sensor values from the onboard gyro/accelerometer.
- Install the Arduino IDE
- Use the board manager in the Arduino IDE to install the dependencies for mbed boards
- Follow the installation instructions for ArduinoCore-mbed
Note: this still requires a local clone of mbed, as well as the mbed CLI v1, and a compiler (tested with GCC) - Modify the variant files as per How to enable external QSPI, if one chooses to use an SPI chip instead of QSPI use
"target.components_add" : ["SPIF"] - Although not necessary, one can apply individual patches to the local mbed copy from Arduino Patches, currently it seems that patch 4 is mandatory for a successful compile, alternatively all patches can be applied through the mbed os to arduino script by specifying the -a flag
- Navigate to the ArduinoCore-mbed local directory and run
./mbed-os-to-arduino -r /path/to/my/mbed-os-fork ARDUINO_NANO33BLE:ARDUINO_NANO33BLE
Remembering to include-aif patches have not been applied - Your new core should be available under the Arduino IDE under boards, select this when compiling to ensure you have the SPIF or QSPIF extensions available
Note: the USB test folder provides a simple script which takes advantage of a USBMSD profile to use the module much like a USB drive, this can be helpful if you are trying to configure your flash storage and want to quickly check the capacity of the module to ensure proper setup.
Ensure your module is wired correctly, if you have made no modifications to the firmware the interface button should be wired to GND and A0, and the reset button should be wired to the RESET and GND pins, as per
| Button | Time | Action |
|---|---|---|
| Interface | <2 seconds | start/stop logging |
| Interface | >2 seconds, <6 seconds | offload data |
| Interface | >6 seconds | reset flash |
| Reset | any | reset software |
| Color | Description |
|---|---|
| Green | Logging to flash |
| Blue | Offloading data |
| Blue & Green | purging buffers before data transfer |
| Red | erasing data |
Currently we use event queues in place of a simple while loop, these spawn their own threads and can dynamically change timing to try and keep a specific interval between event triggers. However, they are currently executed in process context which means they are not guaranteed to run at the exact intervals specified. Additionally, SPI has proven to be somewhat tricky to get working, the patches folder from the arduino mbed core repo tends to help with this but depending on the exact flash chip you are using there may be additional tinkering required.
We currently have a built in delay into updating our bluetooth GATT characteristics to allow the client PC to process the incoming data, this could be improved to be a smarter system. Button events are handled by placing a new event into the event queue and waiting for this to trigger, although this doesn't have much of an impact, this could be moved to an interrupt context to increase responsiveness. Button inputs should also be debounced. Also, general error handling could be improved.
Offloading of data from the module is achieved by taking advantage of the Web Bluetooth API. Currently the API is experimental but should be generally supported on all Chromium based browsers, note that the device running the browser must still have the appropriate bluetooth hardware.The plotting functionality in the web app makes use of the PyScript framework allowing for Bi-directional communication between Python and Javascript objects.
Simply open web/offload.html in the chromium based browser of your choice, this can be achieved by typing the path of the file in the omnibox or by any alternative means supported by your operating system. Once the file is loaded do as follows:
- Ensure the module is in offload mode
- Click transfer
- Wait for the data parameter to have a number and for device to say true
Note: if you do not see a number in the data parameter open the browser console as any errors will be logged there - Wait for the number in data to stop increasing
- Click save, this will download the data as a CSV file
- Click disconnect, if the data has finished offloading this will cause the module to erase all onboard storage
- Click choose file, to select and quickly plot the recently offloaded csv for verification that data has collected properly
Currently we use an event listener which is subscribed to the bluetooth notifications, this acts similar to UDP where the module sending data is unaware of if the data has been recieved. BLE has an alternative called indicate which uses acknowledgements, this is much slower but ensures that all data is sent without any loss.
Offload will sometimes drop a data point, this is because we are using send and forget data transfer, this could be improved to have a recovery system
Contains two python scripts, both are very rough and should only be used as helpful debug tools. serialRead.py serves to capture incoming serial data from a USB port and store it, this can be helpful if you want to log data coming from the modules sensors without going through the saving/offloading process. analysis.py serves as a basic graphing script which uses LOWESS regression to remove noise so one can see a general trend in the data.