Getting Started
FINAL CUT is a library for creating text-based terminal applications. It runs on several Unix-like platforms. FINAL CUT is released under the terms of the GNU Lesser General Public License v3.0 (GNU LGPL v3), which allows flexible licensing of applications. FINAL CUT was written in the programming language C++. Its object-oriented design makes it easy to build fast, lean applications.
FINAL CUT is a widget toolkit. A user interface usually consists of several widgets. FINAL CUT draws widgets on virtual windows and then maps them to a virtual terminal. It uses the terminal capabilities from the Termcap library to display the character matrix of the virtual terminal on the screen or a terminal emulator. It uses various optimization methods to improve the drawing speed.

Figure 1: Structure of a FINAL CUT application
FINAL CUT has many widgets. It offers buttons, input fields, menus, and
various window types and panels for different use cases. Widgets are visual
elements that are combined to create user interfaces. You can easily create
your custom widgets by creating a derived class of FWidget or other existing
widgets. All widgets are instances of
FWidget
or its subclasses.
A widget can contain any number of child widgets. Child widgets are displayed
in the display area of the parent widget. However, FWindow-based window
widgets have their own virtual display area and operate independently of
the parent widget.
Disabling, hiding, or deleting a parent widget automatically affects all
child widgets. This hierarchical behavior is handled by the FObject base
class. For example, addChild() removes the child ownership from an existing
parent object before assigning it to the new target. When a child is deleted,
the parent-child relationship causes its reference in the parent object to be
removed. An explicit delChild() is no longer required here.
The FApplication widget is the root of the application. A root object cannot
have parent widgets. The class FApplication manages
all settings and assigns keyboard and mouse input to the different widgets.

Figure 2: Widget tree of a FINAL CUT application
Only one main widget can be assigned as a child to the FApplication
instance. This main widget is usually a window object that contains all
child widgets of the application. A child widget can also be another
window.
This introduction to FINAL CUT begins with a brief example.
The following example demonstrates how to create an empty dialog box with dimensions of 30 by 10 characters.
File: dialog.cpp
#include <final/final.h>

auto main (int argc, char* argv[]) -> int
{
  finalcut::FApplication app(argc, argv);
  finalcut::FDialog dialog(&app);
  dialog.setText ("A dialog");
  const finalcut::FPoint position{25, 5};
  const finalcut::FSize size{30, 10};
  dialog.setGeometry (position, size);
  finalcut::FWidget::setMainWidget(&dialog);
  dialog.show();
  return app.exec();
}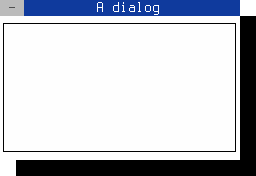
Figure 3: A blank dialog
> [!NOTE] > You can close the dialog with the mouse, > Shift+F10 or Ctrl+^
Important
Before continuing, ensure that FINAL CUT, all required dependencies, and a C++ compiler are installed.
To compile a FINAL CUT application, specify the locations of the header files and the FINAL CUT library. Build tools such as GNU Autotools or CMake can automate this configuration. These requirements also apply when integrating FINAL CUT into your own projects.
-
Check dependencies:
Make sure FINAL CUT is installed. You'll need the header files in your standard include directory and the library file in your system's library path. -
Save the source:
Save the code as dialog.cpp to get started. -
Compile and run:
Use g++ to build the executable:g++ dialog.cpp -o my-dialog -O2 -lfinal
After building, run it with:
./my-dialog
Compile the source file using GCC and pkg-config with this command. Ensure the current directory contains the source code file.
g++ dialog.cpp -o my-dialog `pkg-config --libs finalcut`You can now run the my-dialog executable.
Follow the GNU Automake instructions as outlined below.
File: Makefile.am
LDADD = -lfinal
bin_PROGRAMS = my-dialog
my_dialog_SOURCES = dialog.cpp
Create a configure.ac template that includes the required GNU autoconf M4 macros.
File: configure.ac
AC_INIT([my-dialog], [1.0])
AM_INIT_AUTOMAKE([foreign])
AC_PROG_CC
AC_PROG_CXX
AC_PROG_INSTALL
AC_CONFIG_FILES([Makefile])
AC_OUTPUT

AC_CHECK_LIB([final],
             [main],
             [],
             [AC_MSG_ERROR([libfinal not found!])])
Initialize the build system with:
autoreconf --installExecute the configure script:
./configureBuild the executable application using the following command:
makeThe executable (my-dialog) is created.
Follow the CMake build script as outlined below.
File: CMakeLists.txt
cmake_minimum_required(VERSION 3.12)
project(my-dialog)
list(APPEND CMAKE_MODULE_PATH "${PROJECT_SOURCE_DIR}/cmake/Modules")
find_package(finalcut REQUIRED)
add_executable(my-dialog dialog.cpp)
target_link_libraries(my-dialog PRIVATE finalcut::libfinal)
Note
If CMake does not locate the package file (FindFinalCut.cmake) on the system, copy it from the FINAL CUT source directory to the local CMake directory.
mkdir cmake/Modules
cp {finalcut-source-directory}/Findfinalcut.cmake cmake/Modules/
Create a build directory and change to it:
mkdir build && cd buildRun cmake with the source directory as an argument:
cmake ..Build the application using the following command:
makeThe executable (my-dialog) is created.
#include <final/final.h>All FINAL CUT programs require the header final.h.
finalcut::FApplication app(argc, argv);Initialize the finalcut::FApplication object app by passing
the command line arguments argc and argv. This object manages
the main event loop of the application. It receives keyboard and mouse
events and sends them to the target widgets. You must create an application
object before you can create a widget.
Note
Command line arguments
All FINAL CUT applications support the predefined command-line arguments.
| Option | Description |
|---|---|
| -h, --help | Display the help options |
| --encoding=<MODE> | Sets the character encoding mode. <MODE> can be one of utf8, vt100, pc or ascii |
| --log-file=<FILE> | Writes log output to the file <FILE>.std::clog << "A debug message\n"; creates a log line in this file. To view the output in another terminal, run tail -f <FILE>. |
| --no-mouse | Disable mouse support |
| --no-optimized-cursor | Disable cursor optimization |
| --no-terminal-detection | Disable terminal detection |
| --no-terminal-data-request | Do not determine terminal font and title |
| --no-terminal-focus-events | Do not send focus-in and focus-out events |
| --no-color-change | Do not redefine the color palette |
| --no-sgr-optimizer | Do not optimize SGR sequences |
| --vgafont | Set standard vga 8x16 font |
| --newfont | Enables graphical font |
| --dark-theme | Enables dark theme |
This line
finalcut::FDialog dialog(&app);creates the finalcut::FDialog object dialog using the app
object as the parent. The finalcut::FDialog class is the base class for
creating dialog windows.
dialog.setText ("A dialog");This sets the dialog box title to "A dialog".
finalcut::FPoint position{25, 5};
finalcut::FSize size{30, 10};
dialog.setGeometry (position, size);
This sets the dialog to a width of 30 characters and a height of 10. The position of the window in the terminal is at x = 25 and y = 5.
Note
x=1 and y=1 represents the upper left corner.
finalcut::FWidget::setMainWidget(&dialog);Set the dialog as the application's main widget. When you close
the main widget, the entire application quits.
dialog.show();Widgets are not visible by default when created.
Calling show() makes it (and its child objects
if available) visible.
return app.exec();The last line calls exec() to start the application and return
the result to the operating system. The return value can be
EXIT_SUCCESS (0), EXIT_FAILURE (1), or any other value specified by
FApplication::exit(int retcode). The application then enters its
main event loop, processing all
events, including user interactions with the TUI, until the window closes.
Note
Each FINAL CUT application has exactly one main event loop.