This tutorial shows how to use B&R "Mapp Motion" Technology Package to implement a single axis project. Follow the steps below (some pics link to YouTube) or just download the complete release with Automation Studio project included.
*To run Mapp Motion on a real PLC/axis a license '1TGMPAXIS.00-01' is required !
We will use a B&R "ETA410.0100-132" training "cube".

The ETA uses an ACOPOS P3 and some additional X20 IO. A switch connected to both IO card and Trigger 1 input is also added.


(nothing special e.g. as you are used to)

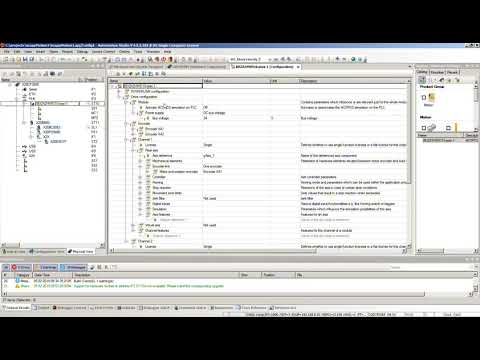
open Configuration View and add a Single Axis Configuration file. All required libraries will be added automatically.
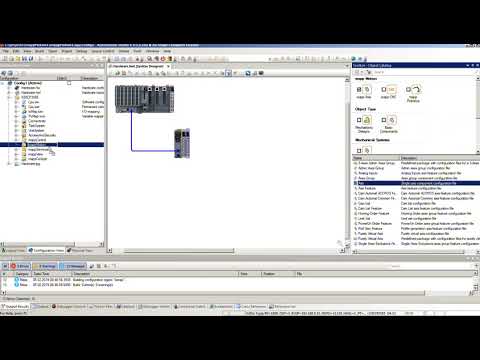
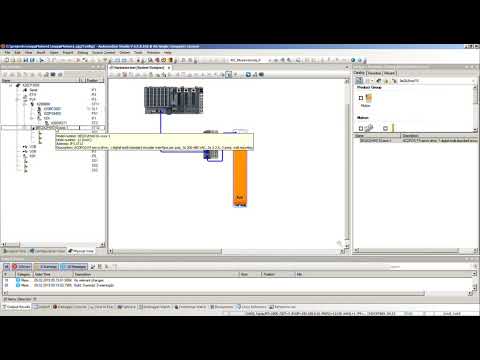
- insert ACOPOS and set correct node number
- set DC bus voltage to 24V due to ETA limitations
- set encoder to "Endat"
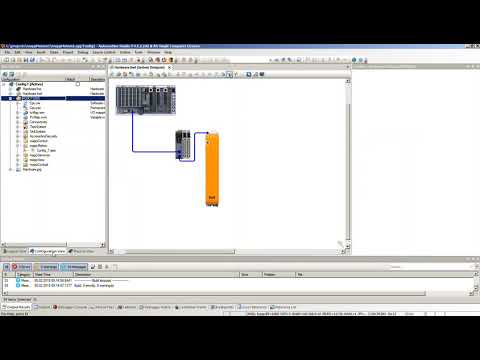
- apply mapp Single axis to hardware
Mapp Cockpit is based on Mapp View Technology (but there is no license required).
- Open Project/Change Runtime Version and set Mapp View and Mapp Cockpit to V5.5
- use SAFE file system and add an user partition (F-drive)
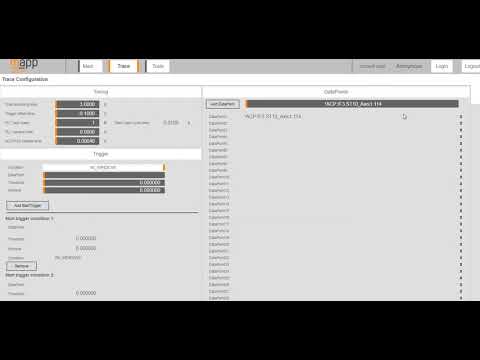
- add a file device where Mapp Cockpit can store trace data.
- activate OPC-Ua as Mapp Cockpit
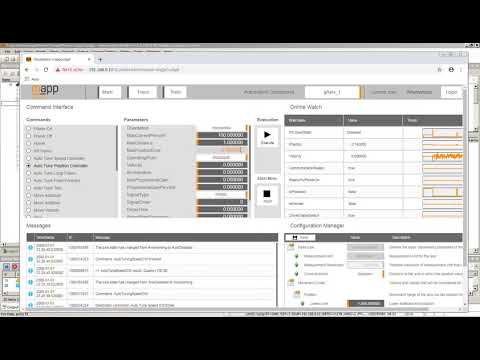
open browser and navigate to
http://<IPADDRESS or HOSTNAME>:81/index.html?visuId=mappCockpit
e.g.
http://192.168.0.10:81/index.html?visuId=mappCockpit
or
http://localhost:81/index.html?visuId=mappCockpit
- autotune speed controller
- autotune position controller
- switch axis on
- start homing
- perform some movements to determine correct axis settings
- save the axis settings to permanent memory
- use Online/Compare/Automation Components to upload the Mapp Single Axis configuration
- use Online/Compare/Hardware to upload controller settings
- Transfer project with uploaded configuration to target again
Just copy the code from GUID a85aaaa7-f087-4977-b4ef-f4bbb1e069bb (Automation Help 4.5.2.10)

- set variable "AxisParameters"
- Power
- Home
- MoveAdditive